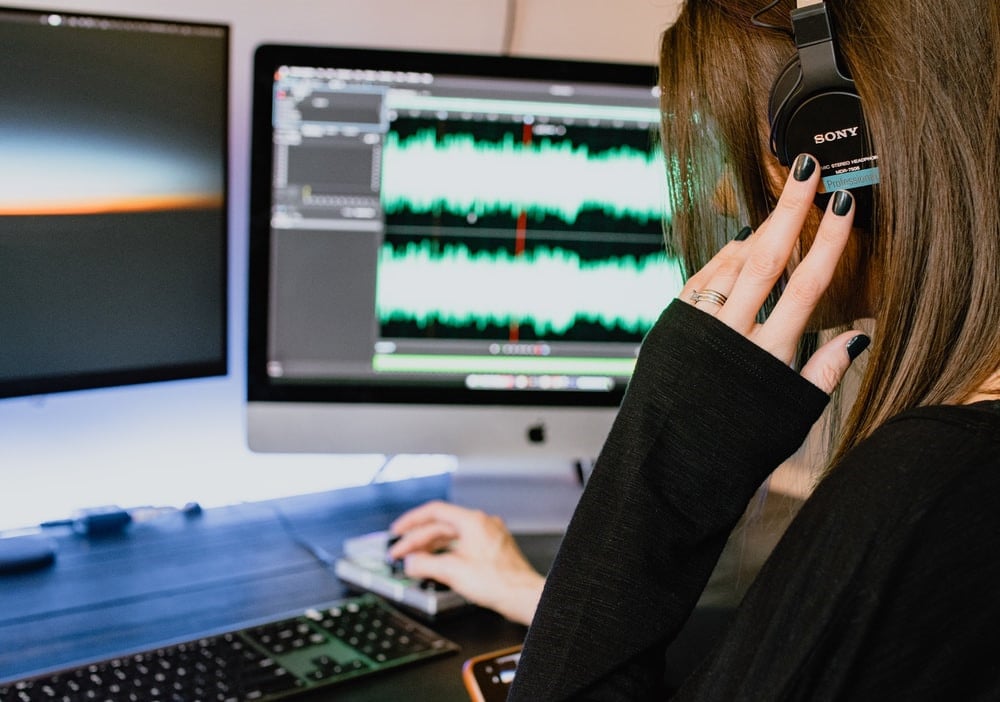
Audio Interface Innovations for Optimal PodcastingPodcasts with poor audio quality are unpleasant. So the audio production quality is essential. If you want to take your podcasting to the next level, it’s time to invest in a decent audio interface device. These devices improve your recording quality and are very easy to get started with.
But what is an audio interface, and how does it work? In this article, we’ll take a look at the audio interface and why it’s essential to anyone trying to record audio.
Part 1. What are audio interfaces for podcasting?

Audio interfaces are unnecessary, complicated gadgets for some people. Others see them as an essential piece of gear to enhance the music experience.
It is a device that converts digital signals from a computer into analog signals. These analog signals can then be recorded and played back on another audio source. This includes microphones and instruments. They have become a necessity in the world of music recording and editing.
The audio interface has a lot to offer. It records and playbacks audio on various devices and is useful for recording:
- Podcasts
- Streaming music
- Even making phone calls on a computer.
Main functions
Here are the main functions of an audio interface.
- It allows you to connects with external devices and record audio from multiple sources. Here are these external devices:
- A microphone
- Computer’s line-in
- Mixer,
- An instrument amp,
- Keyboard
- It lets your playback audio files recorded previously on a computer.
- It can control external devices’ volume, pan, mute, and more.
- Fourth, it lets you stream audio over the internet, like when you use an online streaming platform.
Part 2. What does an audio interface do for a podcast?
If you are looking for ways to record and create podcasts, you should consider investing in an audio interface. An audio interface is one of the first things you’ll need to record your podcasts.
This is one of those things that sounds like an obvious thing to buy, but if you don’t already have one, you should consider buying one.
The Pros and Cons of Recording with an Audio interface:
Pros
- Offers better quality sound
- Control your recording environment
- Add a second microphone
- Add sound effects
- Even cut up your audio
Cons
- Require the high cost of setup
- Requires more space to set up
The Pros and Cons of Recording with a USB microphone:
Pros
- Convenient to use
- It doesn’t need big setups
- Budget-friendly
Cons
- Compromised quality
- Limited editing features
Part 3. Is an audio interface a must for podcasters?
No, since without an audio interface, the recording could be done manually through other means. Therefore, the audio interface helps you record podcast episodes with better quality and higher fidelity, making it easier for listeners to hear your voice.
This means an audio interface is not needed to record a podcast or voiceover but is recommended. With any audio editing or recording, you must ensure that your audio interfaces work in tandem with your computer sound card.
What types of recording setups require an audio interface?
For example, record an acoustic guitar to hear the difference between the various pickup types (strings, bridge, neck, etc.).
You can’t do this without an audio interface. Or, If you plan on making music or mixing audio, you’ll need an audio interface; in addition, those who work within bigger setups to make professional-looking audio give you all the tools necessary to process, mix and master your audio files.
Part 4. Does an audio interface improve sound quality?
Most people were left to wonder whether or not an audio interface made any difference in the sound quality of their recordings. The answer is a resounding yes. An audio interface makes it easier to create better-sounding music, and the equipment is essential to recording high-quality music for distribution.
What does “better audio quality” mean?
“A better audio quality” means you can understand people’s voices more clearly. A sound recorded or reproduced in such a way as to have improved clarity or intelligibility over existing recordings, or to provide greater depth of perception.” In other words, it describes an improvement.
Listening to someone speaking over the phone while trying to talk to them in person, their voice may sound garbled. Because noise surrounds the person’s mouth, creating a distortion in their voice that makes it impossible to decipher who is saying what.
Which parameters determine “better audio quality”?
A microphone records sound waves, and digitization processes the sound waves and converts them into digital data called parameters. The main parameters include
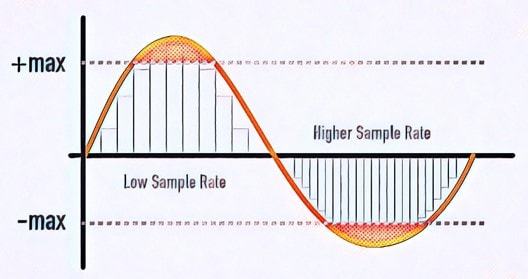
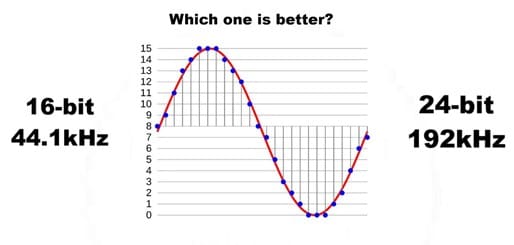
Sample Rate
This is how many audio samples are being recorded per second. Frequency response is the response of a signal to the input. The higher the sample rate, the more information, and detail in the sound.
For example, 44100 (44.1kHz) samples per second are considered good quality.
Bit Depth
Bit depth controls the dynamic range of the recording and measures how many bits of information can be recorded for each sample.
The lowest bit depth you should use for professional recordings is 16-bit, but many digital audio recorders offer up to 32-bit floating settings with a higher dynamic range.
Part 5. Which audio interface should you get for podcasts?
If you’re looking for an audio interface for podcasting, you’re in luck—many options are available. Which is best for your needs and budget, from USB interfaces to standalone Bluetooth audio systems? Here are some of the most popular options in the industry right now.
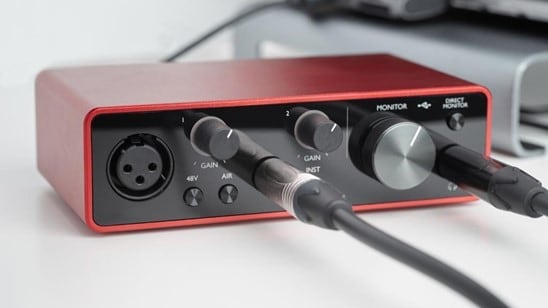
Focusrite Scarlett 2i2
The Focusrite Scarlett 2i2 Studio recording bundle gives you a great recording experience with all the essentials. It’s packed with powerful upgrades, including two upgraded Scarlett mic preamps and high-performance AD/DA converters. The Scarlett 2i2 also offers preamp emulation named ‘Air’ for a clearer, open and brighter sound. That makes this interface a perfect choice for small project studios.
Specifications
- Headphone output
- TRS L/R monitor outputs with level control
- Dual-balanced line inputs
- 3rd-generation Scarlett mic preamps
- Direct monitor circuit
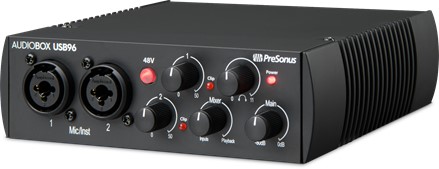
PreSonus AudioBox USB 96
If you want to add a USB audio interface to your studio, check out the AudioBox USB 96. With a two-front panel mic input and great performance, this microphone is a great fit for singers, podcasters, and guitar-bass collaborations.
This interface is one of a kind that delivers impressive results for a low cost. The PreSonus Audiobox is a great portable, easy-to-use, affordable recording solution that will fit your budget.
Specification
- 24-bit/96kHz digital resolution
- 2-channel USB 2.0 interface
- Onboard +48-volt phantom
- Internal analog mixer
- Dual preamplifiers
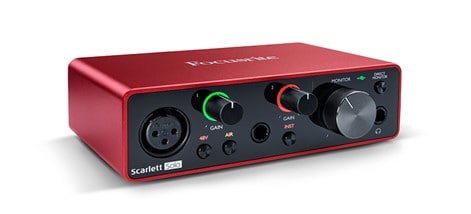
Focusrite Scarlett Solo
The Focusrite Scarlett Solo 3rd Gen is the best recording interface for beginners looking to start making their studio. This audio interface looks nice, and the design is straightforward.
The unit’s solid preamps, agreeable price, and amazing recording quality point set it apart from the pack. Overall, the Scarlett Solo is a very capable digital audio workstation. It will allow you to work on your ideas without getting too bogged down in the audio processing.
Specifications
- 24-Bit / 192 kHz Converters
- 1 Mic Preamp and 1 Instrument
- USB Type-C Connectivity
- 1 Headphone Out, Stereo Monitor Out
- Mic Air Mode
- Bus Powered
Part 6. Additional essential podcasting equipment for a podcast show
Most people aren’t aware that so much more equipment is required to put on a podcast than simply a microphone. Whether audio-recording software or a mixing board, many pieces of equipment are necessary to produce quality audio and video content. Here are the most important equipment needed to create a good podcast.
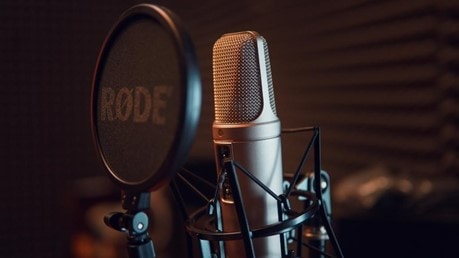
Microphone and Stand
One of the first things you need to get started podcasting is a good microphone, and a quality tripod stands for it. When you’re recording podcasts, you want to ensure you’re getting the best sound. To do so, you need a high-quality microphone that should be durable yet comfortable.
The microphone stand is also one of the essential pieces of audio equipment, as it is used to hold the mic in an optimal position to ensure that the sound quality is at its best.
Mixer
The mixer is the most important piece of equipment for a podcast because it is used for recording and mixing audio. It allows you to adjust the volume of individual mics, which makes it possible to add multiple mics to your podcast. It also allows you to adjust the volume of the overall podcast.
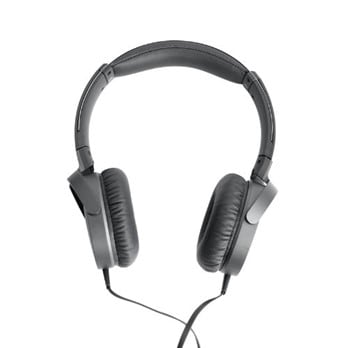
Headphones
Headphones are required if you want to listen to podcasts during your commute. And the best ones for you depend on what kind of audio quality you prefer. A good pair of headphones will last you a long time. They are either wired or wireless; we recommend choosing wired over wireless because they offer low latency and are cheaper than wireless.
Sound Card
Sound cards are vital tools in podcast production. They offer two key features: quality audio and plug-and-play compatibility. A good sound card will have some form of digital audio output, such as optical or USB, allowing your sound card to feed recorded audio to any device, regardless of brand.
Recording and editing software
Audio editing and recording are essential for every podcaster, whether you record in your living room or on the road. If you’re producing audio for a podcast show, you’ll want to find a quality audio editing program to help you create compelling shows with consistent results.
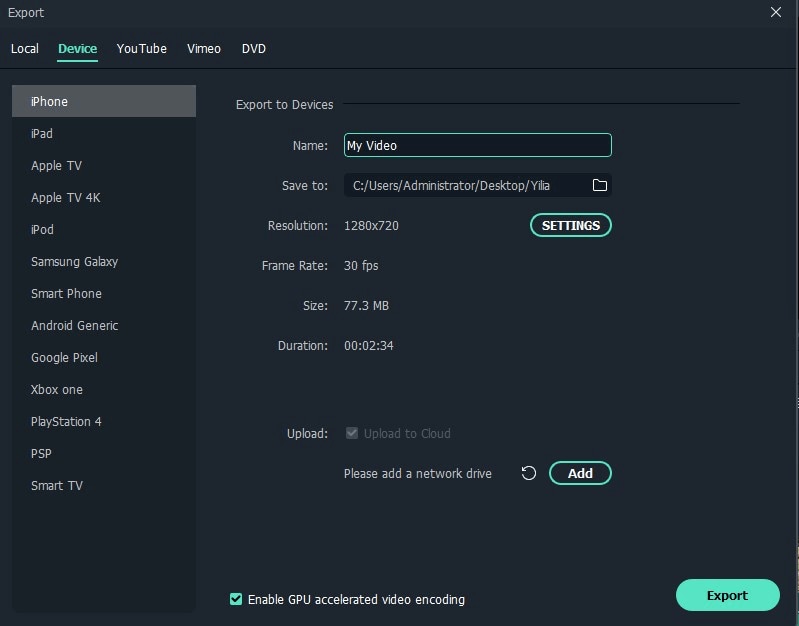
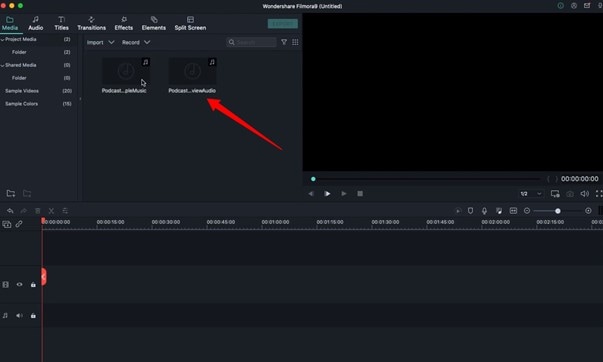
The main reason is that podcasts are usually recorded on the go, which means the software must be easy to use, reliable and intuitive. So if you’re looking for reliable podcast software, look no further than Wondershare Filmora.
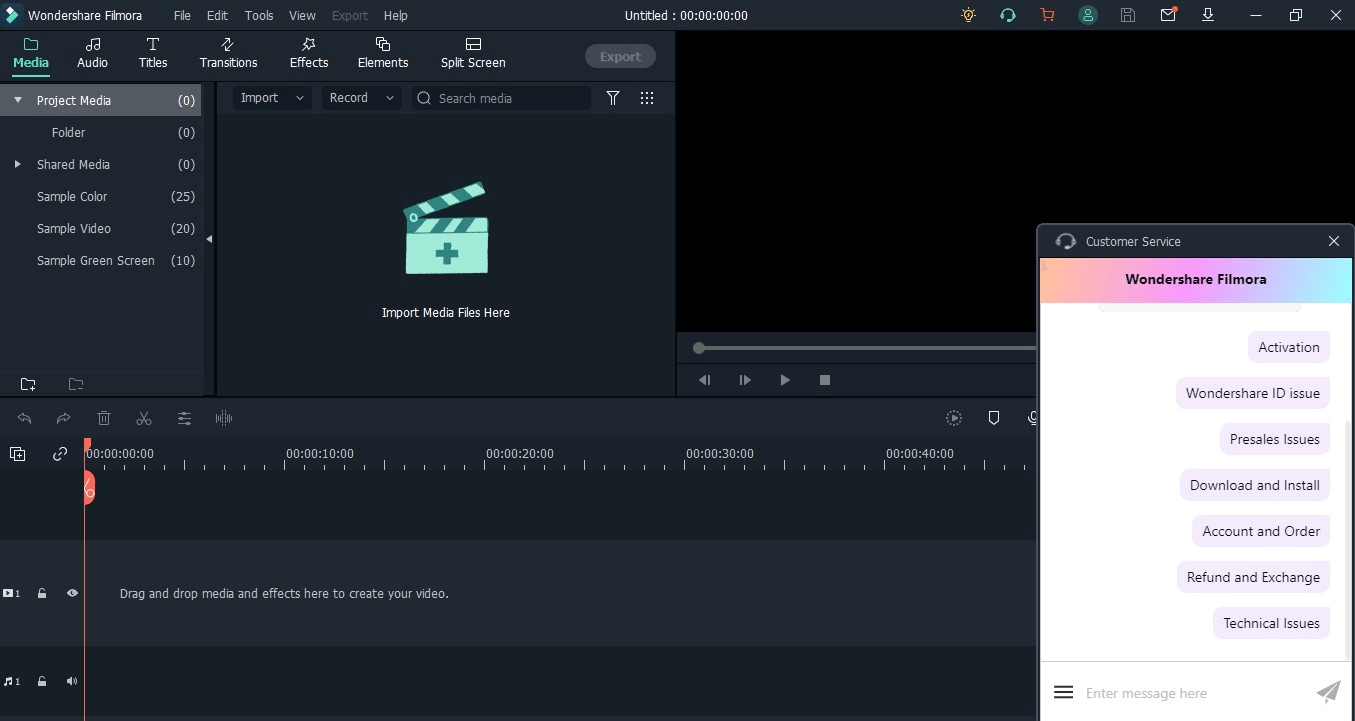
Wondershare Filmora
With a user base of over 60 million users, Filmora is a video editing suite that’s well-suited for podcast production.
It’s easy to use, offering features including motion effects, transitions, text overlays, voiceovers, and color correction. It’s a perfect tool for quickly creating quality audio and video content, especially when it comes to making episodes.
Some of its audio features for editing and adjusting are
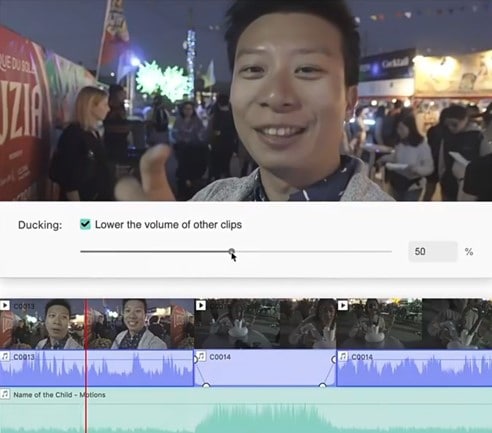
Audio Ducking
With Filmora audio ducking, you can lower the volume of a track while retaining the volume of the other tracks. This lets you record voiceovers, interviews, and podcasts, without the loud music drowning out your voice.
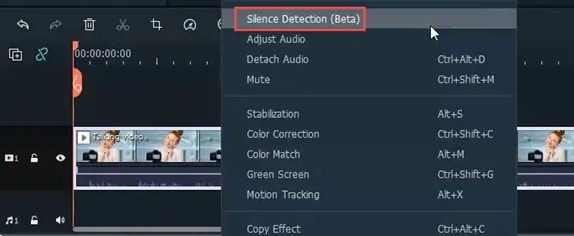
Silence Detection
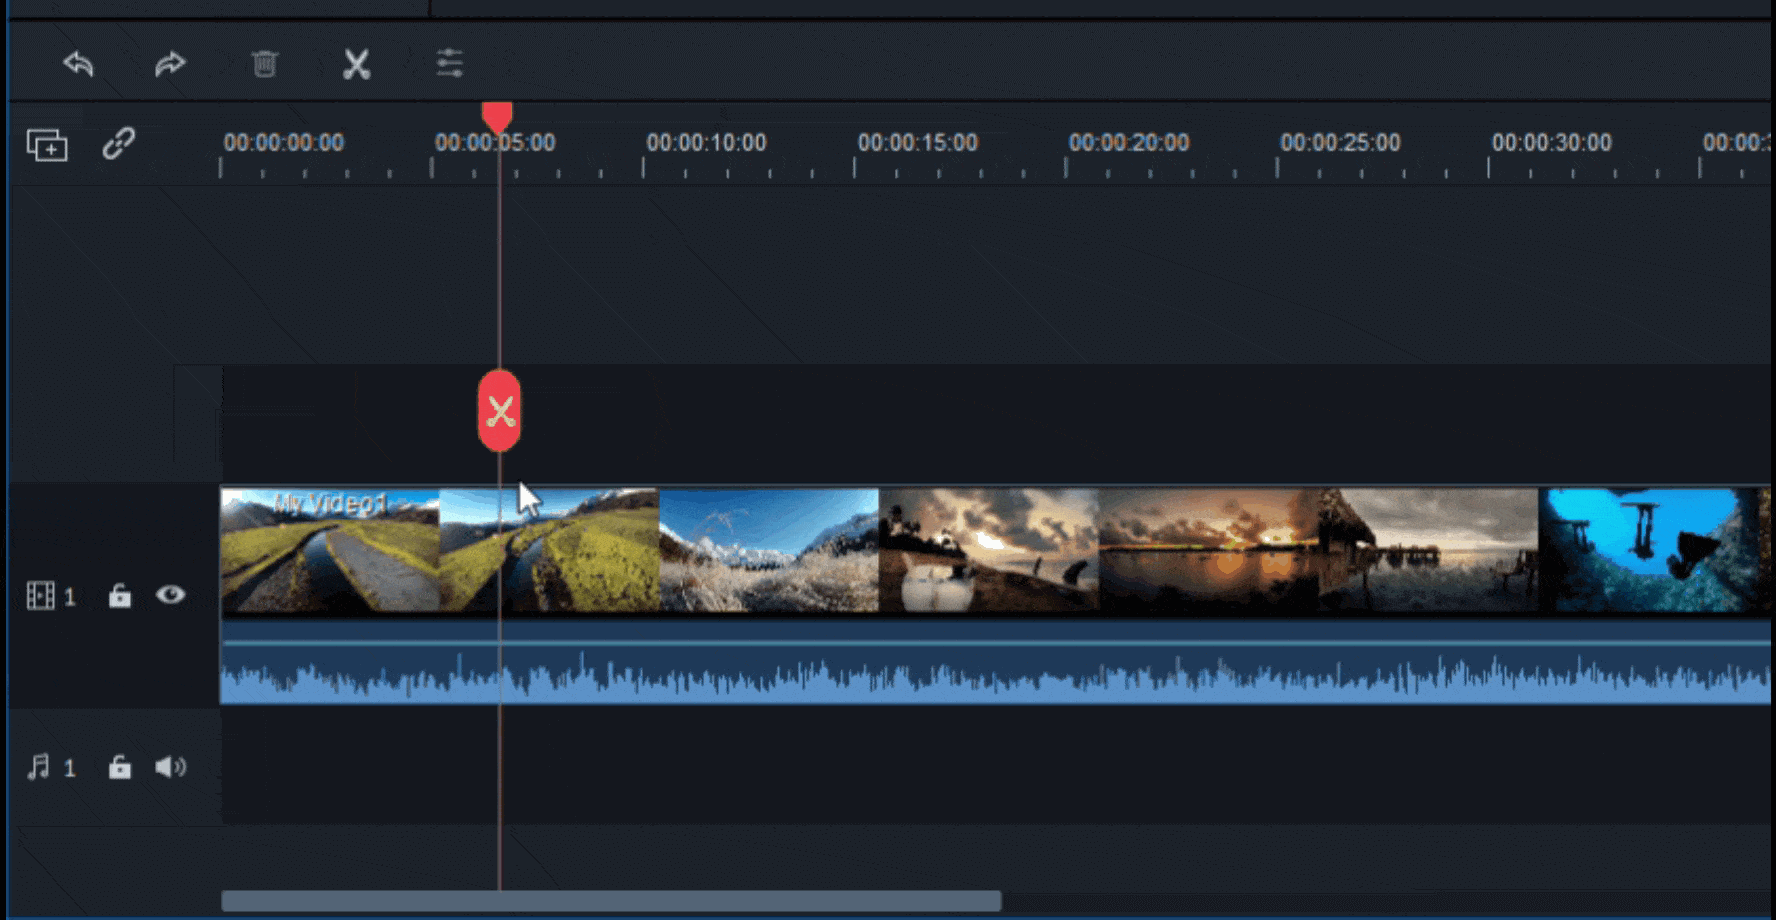
This feature is designed to monitor silent pauses in video files and automatically remove them from the files. Right-click the audio file and select “Silence Detection (Beta).”
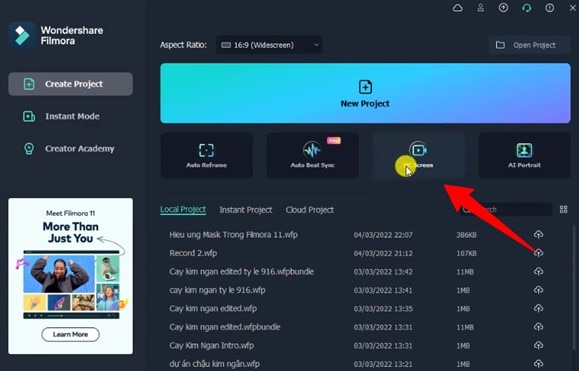
Screen Recording
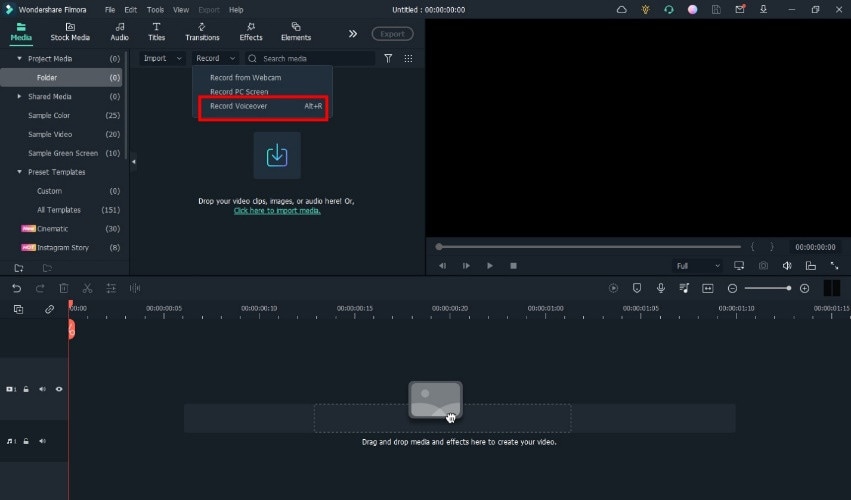
Screen recorder app helps record your PC screen in real time. You can find this feature below the “New Project” tab. Click it, and your screen will start to record.
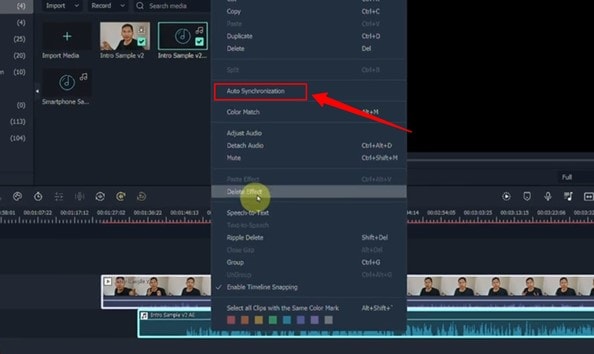
Auto Synchronization
Sometimes, a podcast’s audio and video don’t match each other. To resolve this issue, Filmora offers Auto Synchronization that allows you to synchronize your audio and video easily. All you need to do is, select both audio and video clip, right-click, and select “Auto Synchronization,” and Filmora will do its magic!
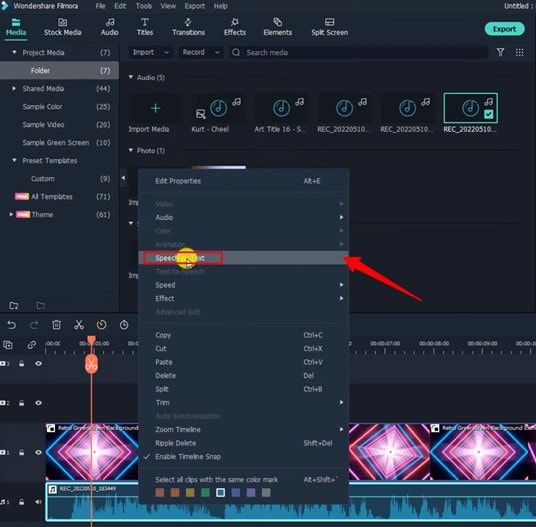
Speech to Text (STT)
To convert your podcast audio into text, you need to use the ‘Speech to Text’ feature of Filmora. Right-click on the audio timeline and select speech to text tool. Next, select the language of your output and choose clip selection. Finally, click OK, and you will have your SR,T file in seconds.
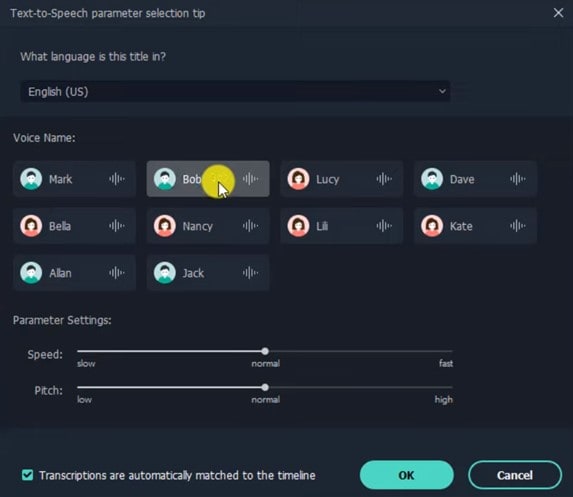
Text to Speech (TTS)
This feature is used if you want to add a voiceover to your podcast using a text file. To use this, right-click on the text timeline and select ‘Text to Speech. Select language and choose Filmora AI voice name e.g., Bob, Mark, Lucy, etc.
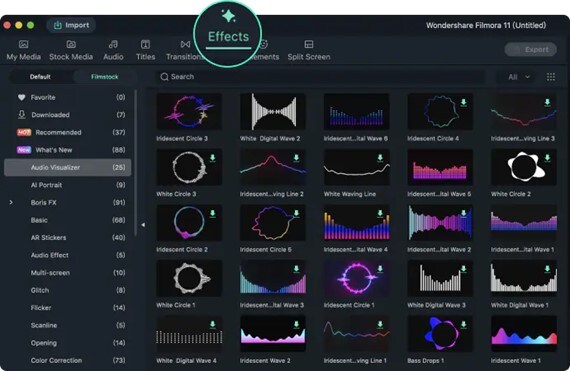
Audio Visualizer
If you want your music or podcast video to come alive, you must check out the audio visualizer effect of Filmora. This will intelligently match the sound in your video and add dynamic effects. Go to Effects and choose ‘Audio Visualizer’. From there, you’ll find up to 25 visualizer effects. They are especially fit for a podcast, so don’t miss it!
Considering all the above audio features offered by Filmora for podcasting, it is the best editing software in the current market. If you are interested in podcasting, Filmora provides you with all you need to make and record podcasts at an affordable price. So why not give it a try?
Final Words
If you are new to this field, you might not be aware that the audio interface is very important for podcasting. But, if you are well-acquainted with podcasting, you would have probably heard this phrase multiple times. It can be said that almost all the top podcasters use the same equipment, which is known as an audio interface. This is why you have to use the right audio interface.
There is so much information on the internet. But sometimes, it’s hard to find what you are looking for. That is why we are here to save you time and effort. So, in this article, we have explained everything you need to know before buying one, including; what an audio interface is, the pros and cons of buying it, etc.
Free Download For Win 7 or later(64-bit)
Free Download For macOS 10.14 or later
The Pros and Cons of Recording with a USB microphone:
Pros
- Convenient to use
- It doesn’t need big setups
- Budget-friendly
Cons
- Compromised quality
- Limited editing features
Part 3. Is an audio interface a must for podcasters?
No, since without an audio interface, the recording could be done manually through other means. Therefore, the audio interface helps you record podcast episodes with better quality and higher fidelity, making it easier for listeners to hear your voice.
This means an audio interface is not needed to record a podcast or voiceover but is recommended. With any audio editing or recording, you must ensure that your audio interfaces work in tandem with your computer sound card.
What types of recording setups require an audio interface?
For example, record an acoustic guitar to hear the difference between the various pickup types (strings, bridge, neck, etc.).
You can’t do this without an audio interface. Or, If you plan on making music or mixing audio, you’ll need an audio interface; in addition, those who work within bigger setups to make professional-looking audio give you all the tools necessary to process, mix and master your audio files.
Part 4. Does an audio interface improve sound quality?
Most people were left to wonder whether or not an audio interface made any difference in the sound quality of their recordings. The answer is a resounding yes. An audio interface makes it easier to create better-sounding music, and the equipment is essential to recording high-quality music for distribution.
What does “better audio quality” mean?
“A better audio quality” means you can understand people’s voices more clearly. A sound recorded or reproduced in such a way as to have improved clarity or intelligibility over existing recordings, or to provide greater depth of perception.” In other words, it describes an improvement.
Listening to someone speaking over the phone while trying to talk to them in person, their voice may sound garbled. Because noise surrounds the person’s mouth, creating a distortion in their voice that makes it impossible to decipher who is saying what.
Which parameters determine “better audio quality”?
A microphone records sound waves, and digitization processes the sound waves and converts them into digital data called parameters. The main parameters include
Sample Rate
This is how many audio samples are being recorded per second. Frequency response is the response of a signal to the input. The higher the sample rate, the more information, and detail in the sound.
For example, 44100 (44.1kHz) samples per second are considered good quality.
Bit Depth
Bit depth controls the dynamic range of the recording and measures how many bits of information can be recorded for each sample.
The lowest bit depth you should use for professional recordings is 16-bit, but many digital audio recorders offer up to 32-bit floating settings with a higher dynamic range.
Part 5. Which audio interface should you get for podcasts?
If you’re looking for an audio interface for podcasting, you’re in luck—many options are available. Which is best for your needs and budget, from USB interfaces to standalone Bluetooth audio systems? Here are some of the most popular options in the industry right now.
Focusrite Scarlett 2i2
The Focusrite Scarlett 2i2 Studio recording bundle gives you a great recording experience with all the essentials. It’s packed with powerful upgrades, including two upgraded Scarlett mic preamps and high-performance AD/DA converters. The Scarlett 2i2 also offers preamp emulation named ‘Air’ for a clearer, open and brighter sound. That makes this interface a perfect choice for small project studios.
Specifications
- Headphone output
- TRS L/R monitor outputs with level control
- Dual-balanced line inputs
- 3rd-generation Scarlett mic preamps
- Direct monitor circuit
PreSonus AudioBox USB 96
If you want to add a USB audio interface to your studio, check out the AudioBox USB 96. With a two-front panel mic input and great performance, this microphone is a great fit for singers, podcasters, and guitar-bass collaborations.
This interface is one of a kind that delivers impressive results for a low cost. The PreSonus Audiobox is a great portable, easy-to-use, affordable recording solution that will fit your budget.
Specification
- 24-bit/96kHz digital resolution
- 2-channel USB 2.0 interface
- Onboard +48-volt phantom
- Internal analog mixer
- Dual preamplifiers
Focusrite Scarlett Solo
The Focusrite Scarlett Solo 3rd Gen is the best recording interface for beginners looking to start making their studio. This audio interface looks nice, and the design is straightforward.
The unit’s solid preamps, agreeable price, and amazing recording quality point set it apart from the pack. Overall, the Scarlett Solo is a very capable digital audio workstation. It will allow you to work on your ideas without getting too bogged down in the audio processing.
Specifications
- 24-Bit / 192 kHz Converters
- 1 Mic Preamp and 1 Instrument
- USB Type-C Connectivity
- 1 Headphone Out, Stereo Monitor Out
- Mic Air Mode
- Bus Powered
Part 6. Additional essential podcasting equipment for a podcast show
Most people aren’t aware that so much more equipment is required to put on a podcast than simply a microphone. Whether audio-recording software or a mixing board, many pieces of equipment are necessary to produce quality audio and video content. Here are the most important equipment needed to create a good podcast.
Microphone and Stand
One of the first things you need to get started podcasting is a good microphone, and a quality tripod stands for it. When you’re recording podcasts, you want to ensure you’re getting the best sound. To do so, you need a high-quality microphone that should be durable yet comfortable.
The microphone stand is also one of the essential pieces of audio equipment, as it is used to hold the mic in an optimal position to ensure that the sound quality is at its best.
Mixer
The mixer is the most important piece of equipment for a podcast because it is used for recording and mixing audio. It allows you to adjust the volume of individual mics, which makes it possible to add multiple mics to your podcast. It also allows you to adjust the volume of the overall podcast.
Headphones
Headphones are required if you want to listen to podcasts during your commute. And the best ones for you depend on what kind of audio quality you prefer. A good pair of headphones will last you a long time. They are either wired or wireless; we recommend choosing wired over wireless because they offer low latency and are cheaper than wireless.
Sound Card
Sound cards are vital tools in podcast production. They offer two key features: quality audio and plug-and-play compatibility. A good sound card will have some form of digital audio output, such as optical or USB, allowing your sound card to feed recorded audio to any device, regardless of brand.
Recording and editing software
Audio editing and recording are essential for every podcaster, whether you record in your living room or on the road. If you’re producing audio for a podcast show, you’ll want to find a quality audio editing program to help you create compelling shows with consistent results.
The main reason is that podcasts are usually recorded on the go, which means the software must be easy to use, reliable and intuitive. So if you’re looking for reliable podcast software, look no further than Wondershare Filmora.
Wondershare Filmora
With a user base of over 60 million users, Filmora is a video editing suite that’s well-suited for podcast production.
It’s easy to use, offering features including motion effects, transitions, text overlays, voiceovers, and color correction. It’s a perfect tool for quickly creating quality audio and video content, especially when it comes to making episodes.
Some of its audio features for editing and adjusting are
Audio Ducking
With Filmora audio ducking, you can lower the volume of a track while retaining the volume of the other tracks. This lets you record voiceovers, interviews, and podcasts, without the loud music drowning out your voice.
Silence Detection
This feature is designed to monitor silent pauses in video files and automatically remove them from the files. Right-click the audio file and select “Silence Detection (Beta).”
Screen Recording
Screen recorder app helps record your PC screen in real time. You can find this feature below the “New Project” tab. Click it, and your screen will start to record.
Auto Synchronization
Sometimes, a podcast’s audio and video don’t match each other. To resolve this issue, Filmora offers Auto Synchronization that allows you to synchronize your audio and video easily. All you need to do is, select both audio and video clip, right-click, and select “Auto Synchronization,” and Filmora will do its magic!
Speech to Text (STT)
To convert your podcast audio into text, you need to use the ‘Speech to Text’ feature of Filmora. Right-click on the audio timeline and select speech to text tool. Next, select the language of your output and choose clip selection. Finally, click OK, and you will have your SR,T file in seconds.
Text to Speech (TTS)
This feature is used if you want to add a voiceover to your podcast using a text file. To use this, right-click on the text timeline and select ‘Text to Speech. Select language and choose Filmora AI voice name e.g., Bob, Mark, Lucy, etc.
Audio Visualizer
If you want your music or podcast video to come alive, you must check out the audio visualizer effect of Filmora. This will intelligently match the sound in your video and add dynamic effects. Go to Effects and choose ‘Audio Visualizer’. From there, you’ll find up to 25 visualizer effects. They are especially fit for a podcast, so don’t miss it!
Considering all the above audio features offered by Filmora for podcasting, it is the best editing software in the current market. If you are interested in podcasting, Filmora provides you with all you need to make and record podcasts at an affordable price. So why not give it a try?
Final Words
If you are new to this field, you might not be aware that the audio interface is very important for podcasting. But, if you are well-acquainted with podcasting, you would have probably heard this phrase multiple times. It can be said that almost all the top podcasters use the same equipment, which is known as an audio interface. This is why you have to use the right audio interface.
There is so much information on the internet. But sometimes, it’s hard to find what you are looking for. That is why we are here to save you time and effort. So, in this article, we have explained everything you need to know before buying one, including; what an audio interface is, the pros and cons of buying it, etc.
Free Download For Win 7 or later(64-bit)
Free Download For macOS 10.14 or later
Also read:
]]>